Thursday, October 29, 2015

Skulls

Hey!!

This week's manicure was inspired by the holiday that is coming up this weekend, Halloween! I knew automatically that I wanted to do a black manicure but I wasn't sure what to do with it. I did some searching online and I found a really fun look with skulls. For this manicure you will need a black and white nail polish and dotting tools.

I started with a base coat of OPI nail envy. I then did two coats of Orly Liquid Vinyl. Once that was dry, I used a large dotting tool and OPI Alpine Snow to place 4 or 5 dots on the nail. I then used a very small dotting tool and the same white nail polish to make another line underneath the dot, so as to make the jaw of the skull. Once that dried, I used the black nail polish and a small dotting tool to make the eyes, nose and teeth holes. I then used the white nail polish and a small dotting tool to place white dots around the skulls. Once it was all dry, I finished the manicure with a fast drying top coat of INM Out the Door.


Orly Liquid Vinyl


OPI Alpine Snow dots 


Line underneath dots to make jaw

Black dots for eyes

More dots for nose and mouths

White dots surrounding skulls


Finished!

So fun, right?!  I realized once I was done, that I could have used any other color for the dots that surround the skulls and made it more colorful, but I like this too. It is very appropriate for Halloween. The hardest part about this mani is how small the skulls were and how I had to place the dots very carefully to make them. I tried making the white dots larger, but that's as big as I could make them. The bigger the skulls are, the easier it is to place the rest of the dots to finish the face. My black nail polish was difficult to work with, getting hard and tacky, which is why I had some strings of black left over from the dots. I need to buy another black polish. Well, I hope you enjoyed this look and I will see you next time!


Thursday, October 22, 2015

Dotticure

Hello!

This week's look was inspired by another manicure I saw on a Youtube channel called cutepolish. She has great video tutorials on how to do LOADS of nail art looks. For today's look you will need two colors of nail polish, and a medium and small sized dotting tool.

I started out with a base coat of OPI nail envy. I then painted my pinky, pointer and thumbs with two coats of Orly Buried Treasure. I painted my middle and ring fingernails with two coats of Julep Bette. Once that was dry I used a medium sized dotting tool and Orly Buried Treasure and painted on top of the Julep Bette color a dotted X, so that it covers the entire nail. Then following the V pattern that you see when you cut the X in half, I made more dotted lines above and below the X and to the left and right of the X. Once all was completely dry, I finished my manicure with a fast drying top coat of INM Out the Door.


Orly Buried Treasure & Julep Bette

Dotted X 

More dotted lines surrounding X 


Finished!


I really love how this turned out! The contrast of these two colors is great! It's fun choosing which fingers to accent. I am seeing this trend a lot and I like it! I did think once I was done, that it would have been cool to use a different color for the dotted lines that surrounded the initial X that I drew, but I didn't have a color that would have worked. Anyway, just a thought if you want to try mixing it up! I hope you enjoyed this look and I will see you next time!


Thursday, October 15, 2015

Breast Cancer Awareness

Hey there!!

This week my manicure was inspired by a cause. October is breast cancer awareness month. I was also given a brand new white nail polish last week and I knew right away how I wanted to use it for this themed mani. For this look you will need a pink, white and a glitter overlay nail polish and a dotting tool.

I started with a base coat of OPI nail envy. I then did two coats of Sei Bella Pink Sherbet except for my ring finger nail which was painted with two coats of OPI Alpine Snow. Once that was dry I painted over the pink nails with Sei Bella Crystal Sands. I then used a medium sized dotting tool and Sei Bella Pink Sherbet to make the pink ribbon on top of the white nail. Once it was all dry, I finished my manicure with a fast drying top coat of INM out the door.


Sei Bella Pink Sherbet & OPI Alpine Snow


Sei Bella Crystal Sands over Sei Bella Pink Sherbet


The hardest part about this manicure was drawing the pink ribbon with a dotting tool. I would have used a brush if I had one. It would have been easier. I really liked this color scheme, it's so girly. I hope you enjoyed this look and I will see you next time! 


Thursday, October 8, 2015

Bubbles

Hi there!

This week I knew what colors I wanted to use for my manicure, but the actual design didn't come until I started painting. I knew I wanted to use my dotting tool and I came up with this look. For this manicure you will need two colors of nail polish and a dotting tool.

I started with a base coat of OPI nail envy. I then painted my pinky, middle and pointer fingernails with two coats of Sei Bella Vintage Teal and my ring fingers and thumbs were painted with two coats of Icing Heavy Metal. I then used a medium sized dotting tool and Icing Heavy Metal, to place five dots on the inner bottom left corner of the nail, just on the nails painted in teal. I then used a smaller sized dotting tool to make another dotted diagonal line across the entire nail so that it encloses the larger dots. Once that was completely dry, I finished my manicure with a fast drying top coat of INM Out the Door.

Sei Bella Vintage Teal & Icing Heavy Metal

Dots in Heavy Metal on top of teal 

Finished!

So, what do you think? The dots and the colors I chose made me think of bubbles, so that's what I called it. I like how the ring finger is the accent nail by making it just a plain solid color. Simple yet cute. Well, I hope you enjoyed this look and I will see you next time!
Thursday, October 1, 2015

Nude stripes

Hello!

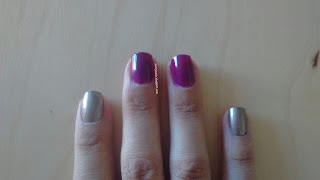
This week's mani is another simple and cute look achieved with striping tape. For this look you will need striping tape and two colors of nail polish.

I started with a base coat of OPI nail envy. I then used three pieces of striping tape and placed them at the base of the nail right above the cuticle, horizontally. I then used Sei Bella Vintage Mauve on my ring and index fingernails and Sei Bella Crushed Berries on the rest of my nails, to paint over the entire nail with the striping tape in place. I then carefully removed the striping tape and once my nails were completely dry, I finished my manicure with a fast drying top coat of INM out the door.


Striping Tape 

Sei Bella Crushed Berries 

Striping tape removed 

Finished!

I love how this turned out!! So easy and so fun!! You could totally change this up by using a base color that contrasts with the color you use over the striping tape. I hope you enjoyed this look and I will see you next time!